What to Look for in a Rental House: 9 Checks for 2026
A rental can look perfect during a twenty-minute tour and still hide a failing water heater, a missing smoke alarm, or mold behind a bathroom wall. The useful question isn't whether the place feels right. It's what you can test, photograph, and document before you sign.
Walk in with a plan. These nine checks follow a practical route through the house, from plumbing and power to structure and lead disclosure. Bring a phone for dated photos, a small flashlight, and a notepad. Ask the landlord or agent before testing equipment or opening panels.
A rental's appearance is only one part of the decision. Before committing, calculate the full monthly cost, including utilities and required fees, and confirm which repairs the landlord will handle. A useful starting point is this guide to eight key areas to inspect. Use the visit to verify details, not just to admire the rooms.
1. Water Pressure, Drains, and Water Heater
Start at the taps. Turn on each faucet, run the shower, and flush every toilet. Check how quickly hot water arrives and whether it stays hot while you use more than one fixture. Run a sink and shower at the same time if the landlord permits it. A sudden pressure drop can point to a problem you'll want explained before signing.
Look under every sink with your flashlight. Check for drips, swollen cabinet panels, water marks, and fresh repairs that don't appear finished. A stain under the kitchen sink, for example, is easier to address before move-in than after a landlord later disputes when the damage occurred. Photograph the area with your phone's date information visible, and send the image to the landlord with a written request for repair.

Check the tank and record the response
Ask when the water heater was installed, what its capacity is, and whether the landlord has service records. The installation date may appear on a label attached to the tank. Don't treat a verbal answer as a repair commitment. If the landlord says a leak or slow drain will be fixed, ask for that promise in writing and keep it with your tour notes. For rental-property data and listing information, RealtyAPI.io's real estate API is one resource for teams building search tools.
Practical rule: A fixture that works only when used by itself hasn't passed the test. Check how the plumbing behaves under ordinary simultaneous use.
2. Electrical System, Outlets, and Breakers
Flickering lights, warm switch plates, and a burning smell deserve immediate attention. Turn each light on and off, and check whether the switches respond reliably. If the landlord allows it, look at the breaker panel. The breakers should be clearly identified enough that someone can locate the right circuit in an emergency.
Bring a plug-in outlet tester and check outlets room by room. Test the outlets you're likely to rely on, including those near kitchen counters, bathroom sinks, laundry equipment, and outdoor areas. A bathroom outlet that appears to lack ground-fault protection is a reason to ask the landlord to investigate and correct the issue before you move in. Don't remove outlet covers or handle exposed wiring during a viewing.
Ask about past electrical work
Ask when the home was last rewired or inspected, and whether the landlord has records. Note outlets that feel loose, show discoloration, or don't hold a plug securely. Take a photo of any visible concern and write down its exact location, such as “left of the bathroom mirror,” rather than making a general note that the wiring needs work.
A home can have plenty of outlets and still have an electrical problem. Test the ones you'll use, then get a written response to any failed test. Don't assume a cosmetic fix, such as replacing a faceplate, addresses a safety concern behind the wall.
3. Heating, Cooling, and Ventilation
A pleasant temperature during the tour doesn't prove the system works in the season you need it. Turn the thermostat to heat and cool modes if the landlord permits it, even if you only need one mode that day. Listen for unusual rattling or grinding, and check whether air comes through the vents in each room. If the system doesn't respond within a few minutes, ask what you're seeing and request a follow-up test.
Look at the filters and ask who supplies and replaces them. Check that furniture or stored items aren't blocking vents. In the bathroom and kitchen, turn on the exhaust fans and listen for operation. A fan that runs but doesn't seem to move air may not be doing its job.
Find out how the system affects the bills
Ask when the furnace, boiler, or air conditioner was last serviced and how old it is. Request the previous year's energy bills, if available, so you can judge the home's seasonal running costs rather than guessing from the rent. Also clarify who arranges routine servicing and who pays if the equipment stops working. Details about rental-property expenses can be explored through RealtyAPI.io's apartment expenses endpoint.
A renter viewing a house during a warm spell should test the air conditioning before committing to a lease that begins in summer. “It worked last year” isn't the same as confirming it works now. Write down which modes were tested and anything the landlord agrees to repair.
4. Moisture, Mold, and Water Damage
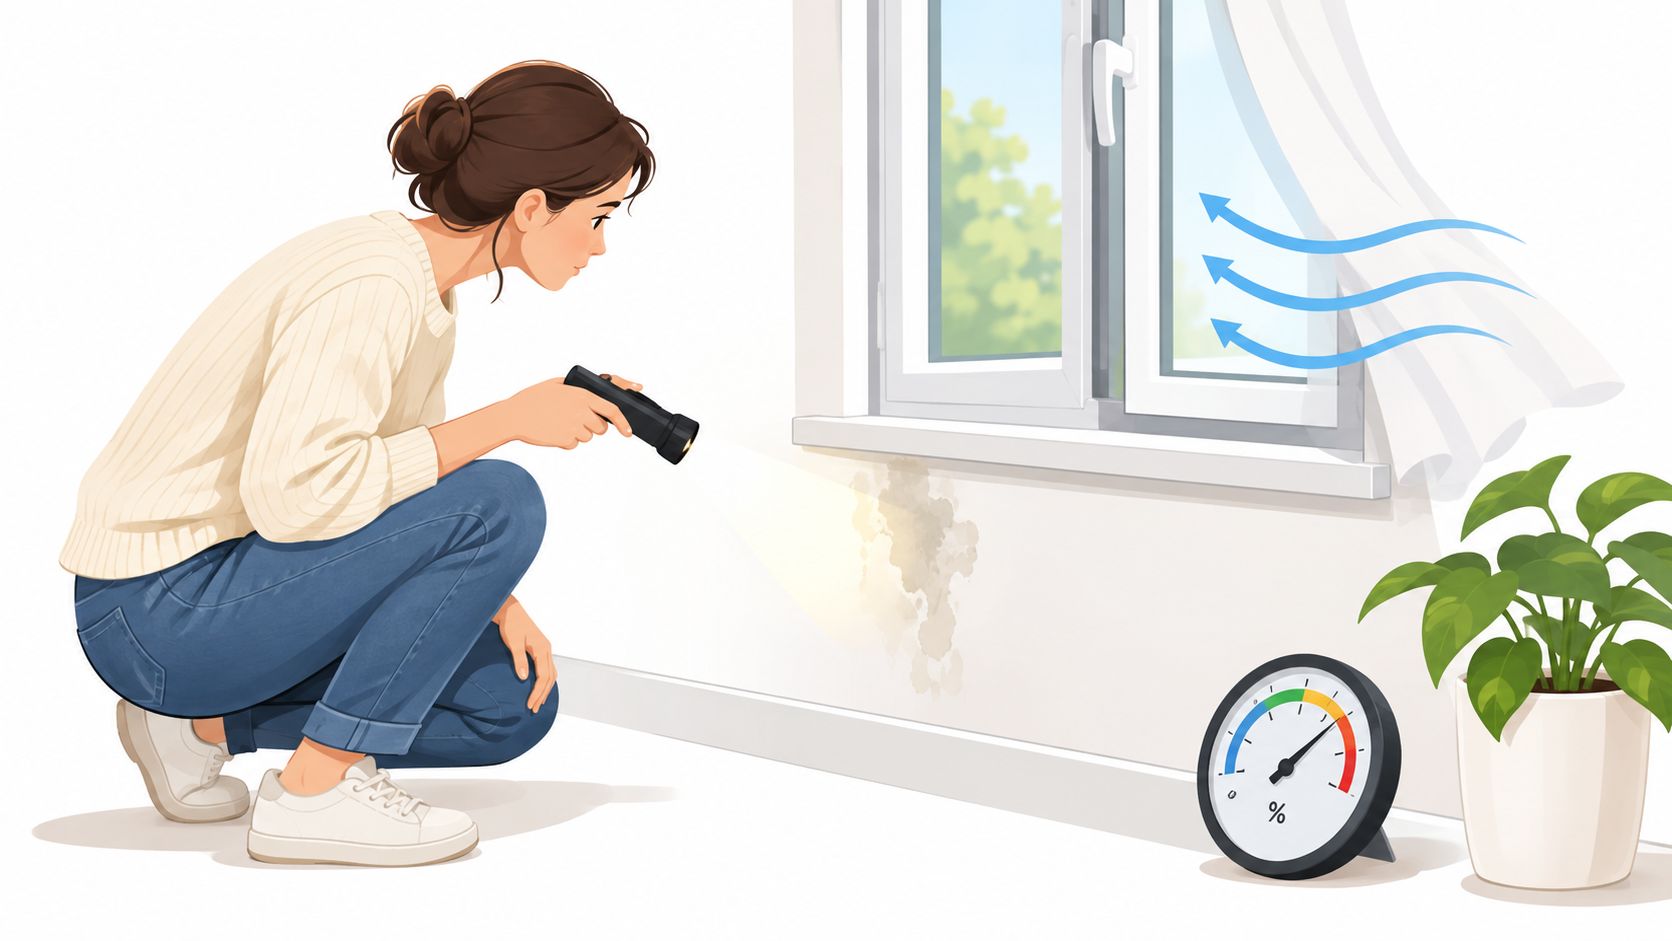
Musty smells often tell you where to look next. Check bathrooms, basements, window corners, and the areas under sinks. Use a flashlight to examine ceilings and walls for dark spots, peeling paint, bubbling drywall, or fresh paint that seems to cover a patch. Look at the floor near appliances and plumbing for warping or soft areas.
Open cabinets beneath sinks and pay attention to odor and swelling. Ask the landlord whether the house has had leaks or flooding and whether any moisture problem has been repaired. If you see ceiling staining, ask for a written explanation of its cause and the repairs completed, or a commitment to investigate it before move-in. Record the room and exact location in your notes.
A clean coat of paint doesn't establish that a leak is fixed. Ask what caused the mark, what work was done, and whether the repair can be documented.
A small hygrometer can help you check humidity during the visit, though one reading won't explain the history of the house. After moving in, monitoring humidity can help you spot conditions that may need attention. Photograph visible staining and ask about bathroom and kitchen exhaust ventilation. A flashlight check for mold and water damage can help you record what you see, but don't disturb suspected mold or conceal the concern with cleaning.
5. Windows, Doors, and Locks
Work through the house and open and close every accessible window and door. Each should move without excessive force, close fully, and latch. Check that window locks work, especially on the ground floor, and look for damaged screens, gaps around frames, or signs of drafts. Test the deadbolt and any sliding-door or garage-door access to the house.
Ask whether the locks were rekeyed after the previous tenant left. If the answer is unclear, request rekeying before move-in and get confirmation in writing. Find out how many keys you'll receive and whether anyone else, such as a maintenance provider, will retain access. A renter who doesn't know who holds a key can't assess who may enter the home.
Check the outside as well
Look at exterior lighting near entrances, and if possible, see how it works after dark. Check whether a side door or garage entrance can be secured from inside. Note any broken latch, loose handle, or window that won't lock, and photograph it from a safe position.
A door that closes but won't latch is still a security problem. Don't accept “we'll take care of it” as the final record. Ask the landlord to put the repair and its expected timing in writing, then keep that message with your move-in documentation.
6. Smoke Alarms, Carbon Monoxide Detectors, and Fire Safety
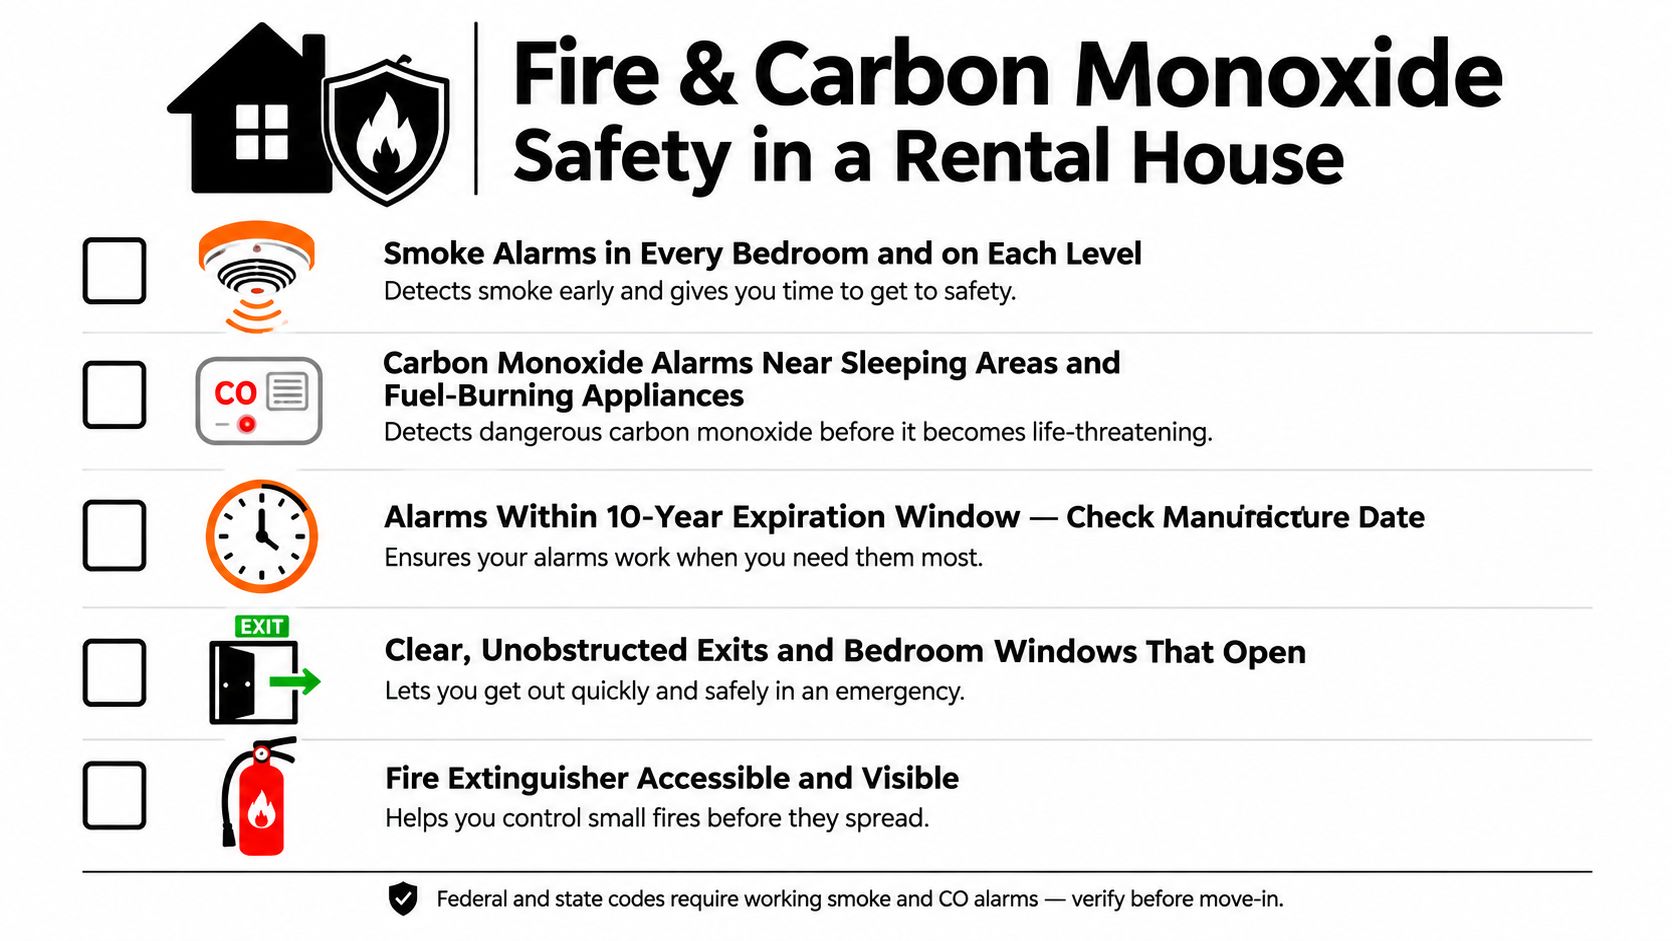
Press the test button on each smoke alarm and listen for a clear response. Check for carbon-monoxide alarms near sleeping areas and near fuel-burning equipment, such as a gas furnace, water heater, fireplace, or stove. Look at every occupied floor, not just the hallway you see first. England's rules require a smoke alarm on each storey with a room used wholly or partly as living accommodation, and a carbon-monoxide alarm in a living-accommodation room with a fixed combustion appliance, except a gas cooker. The landlord must check that alarms work at the beginning of each new tenancy or licence, according to England's guidance on landlord alarm responsibilities.
Ask who replaces batteries and failed units. Look for clear exits and confirm bedroom windows open easily enough to serve as an emergency route where applicable. If the landlord provides a fire extinguisher, check its condition and location. An alarm that doesn't sound when tested is a safety defect, not a minor punch-list item.
Match alarm locations to the house
Carbon-monoxide protection depends on the house layout and its equipment. In Boulder, Colorado, rules call for alarms in rented homes with fuel-fired equipment, fireplaces, or attached garages, generally within 15 feet of the entrance to each sleeping area. Those rules also specify different checks for hardwired and battery-powered devices, so use local requirements and the alarm's instructions rather than assuming one placement rule applies everywhere. The fire-prevention inspection checklist can help you keep track of the points to verify.
Photograph each alarm's location and note whether it passed the test. Ask the landlord to replace a missing, damaged, silent, or end-of-life unit before you take possession, and keep the response in writing.
7. Appliances and Kitchen Systems
Test every appliance the lease says comes with the house. Turn on the stove, oven, and microwave; run the dishwasher; and check the refrigerator and its door seal. If a washer and dryer are included, ask whether you can run a cycle during the visit. A machine that powers on but won't drain or complete its cycle hasn't passed a meaningful test.
Check whether the refrigerator door closes firmly. A dollar bill held in the door seal can help reveal a weak grip if it slips out easily, though this isn't a substitute for a full inspection. Watch the dishwasher through its cycle if time allows, and check below and around it for leaks. If an oven heats unevenly or an appliance doesn't work, photograph the model and defect and list it on the move-in condition form.
Put repair responsibility in the lease
The lease should say which appliances the landlord will maintain and repair. Don't assume that every appliance left in the home is included as a landlord responsibility. Ask for written confirmation, especially when a dishwasher, washer, dryer, or refrigerator is essential to your household.
A renter who records a broken dishwasher before moving in has a clearer basis for requesting repair than someone who reports it later without documentation. For teams building property search experiences, RealtyAPI.io's amenities endpoint can provide listing details when the underlying source makes them available. Listing information is useful for comparing homes, but it doesn't replace testing the appliance in person.
8. Signs of Pests and Insects
Look under sinks, behind accessible appliances, inside closets, and along baseboards. Use a flashlight to check for droppings, gnaw marks, grease trails, nests, or dead insects. In a basement or attic, look for signs of rodents near walls and stored materials. Don't rely on a quick glance at the kitchen counters; pests often leave evidence in less visible places.
Ask the landlord about pest treatment history and whether a regular pest-control service visits the property. If you spot droppings under a sink, photograph them and ask for an inspection and treatment before move-in. Request written confirmation of what will be done and who will pay for follow-up if the problem returns.
If you see evidence, record the location before anyone cleans it. A clear photo and written request make it easier to establish that the issue existed before you moved in.
Ask neighbors whether they've noticed recent pest problems, if you have an opportunity to speak with them. Also confirm the lease's pest-treatment responsibilities. Pet rules and pest responsibilities are different questions, but rental listing and policy data can help teams organize property details through RealtyAPI.io's pet-policy endpoint.
9. Structural Condition, Flooring, and Lead Paint Disclosure
Walk slowly through each room and pay attention to the floor underfoot. Look for large or widening cracks in walls and ceilings, sloping or bouncy floors, loose tiles, stains, and soft spots. Check stairs, balconies, and railings for movement. Press on stair treads and hold the railing as you climb. A sticking door may be a simple maintenance issue, but if several doors stick alongside sloping floors or visible cracks, ask the landlord whether the home has had a structural assessment.
A small level or phone level app can help you record a floor that appears uneven. Take photos of cracks, damaged flooring, loose rails, and any appliance or fixture defects. Ask whether inspection reports exist for the foundation or other structural work, and request copies if the landlord agrees to share them.
Confirm lead-paint paperwork
For homes built before 1978 in the United States, federal law requires landlords to disclose known lead-based paint hazards and provide the EPA lead hazard pamphlet before lease signing. If the house falls into that category, ask for the disclosure documents before you sign and keep a copy with the lease. Don't treat a fresh coat of paint as proof that the home is free of lead hazards.
If a condition statement or move-in form is provided, compare it with what you saw during the tour. Add omissions, date the notes, and return the record as required by your lease or local rules. The photos and written descriptions matter later if someone disputes whether damage was already there.
9-Point Rental House Inspection Checklist
| Inspection Area | 🔄 Implementation Complexity | ⚡ Resources Required | 📊 Expected Outcome | 💡 Ideal Use Case | ⭐ Key Advantage |
|---|---|---|---|---|---|
| Water Pressure, Drains, and Water Heater | Moderate: test fixtures and inspect visible plumbing | Few minutes; flashlight; water-heater details | Identifies leaks, drainage issues, and aging equipment | Before signing or documenting move-in condition | Can prevent costly water damage and repair disputes |
| Electrical System, Outlets, and Breakers | Moderate: test outlets and switches; panel access may be restricted | Outlet tester; a few minutes per room | Reveals basic safety, grounding, and outlet issues | When checking whether wiring meets household needs | Helps identify shock and fire risks |
| Heating, Cooling, and Ventilation (HVAC) | Moderate: test heat and cooling modes and inspect airflow | Thermostat access; service records; several minutes | Confirms system response and ventilation function | Before leasing, especially ahead of extreme weather | May reveal costly performance or maintenance problems |
| Moisture, Mold, and Water Damage | Moderate: inspect rooms and hidden-prone areas | Flashlight; optional hygrometer | Flags visible moisture, mold indicators, and ventilation concerns | In bathrooms, basements, and areas with past leaks | Early detection can reduce health and structural risks |
| Windows, Doors, and Locks | Low: operate and check each opening | No special tools; a few minutes | Confirms basic access security and identifies drafts | During a standard walkthrough | Fast check of security and potential energy loss |
| Smoke Alarms, Carbon Monoxide Detectors, and Fire Safety | Low: test alarms and check exits | Alarm test buttons; ladder may be needed | Confirms alarms respond and escape routes are usable | Before move-in or when reviewing life-safety readiness | Tests critical protections in only a few minutes |
| Appliances and Kitchen Systems | Moderate: operate included appliances and clarify responsibilities | Appliance access; time for cycle tests; lease review | Identifies failures and clarifies repair obligations | When appliances are included in the rental | Helps avoid disputes over pre-existing appliance problems |
| Signs of Pests and Insects | Low to moderate: inspect likely hiding places | Flashlight; pest-treatment history if available | Detects visible evidence and possible recurring issues | In kitchens, storage areas, and multi-unit buildings | Early reporting may help prevent infestation spread |
| Structural Condition, Flooring, and Lead Paint Disclosure | Moderate: inspect surfaces, stairs, and railings; lead requires documentation or testing | Optional level; past reports; lead disclosure for pre-1978 homes | Flags visible safety concerns and checks required lead documentation | For older homes or properties with cracks, uneven floors, or loose railings | Helps identify safety hazards and verify lead-related paperwork |
Sign Only After the Checklist Holds Up
Before signing, review your photos and notes in order. Check that every failed test has a written response from the landlord, not just a verbal promise made during the tour. The response should identify the problem, the agreed repair or replacement, and when the work will be completed. Put that commitment in the lease or an addendum when possible.
Compare the advertised rent with the full monthly cost. Ask for a complete fee schedule and separate mandatory charges from optional services. Confirm which utilities are separately billed, ask for recent bills if available, and check who pays for maintenance, appliance repairs, pest treatment, and emergency work. An appealing rent can become harder to manage when fees, utilities, transportation, and other recurring costs are added.
Use the move-in record to establish the home's condition before your belongings arrive. Include dated photos of stains, cracks, broken fixtures, appliance defects, and anything the landlord agreed to repair. Ask where the security deposit will be held, what deductions are allowed, and which local return rules apply. Deposit limits and deadlines vary by jurisdiction, so check the rules for the location of the house. For an example of how local requirements can shape the move-in process, review this overview of Texas walkthrough rules.
A good tour isn't about finding a perfect house. It's about discovering what works, identifying what needs attention, and making sure both sides record the same facts. If the landlord won't explain a visible leak, refuses to test an alarm, or won't document an agreed repair, pause before paying a deposit or signing. You can compare another house; it's harder to undo an unclear lease after you've moved in.
Keep the checklist, photos, lease, and repair messages together. Before you accept the keys, take a final look at the rooms and confirm that promised work has been completed or scheduled in writing. A house that passes the practical checks and comes with paperwork to prove it is one you can rent with greater confidence.
RealtyAPI.io provides rental listing data that can include price, property details, photos, listing status, amenities, and accessibility attributes when available from the underlying source. If you're building a rental search or comparison tool, visit RealtyAPI.io to explore its real estate data API.